Welcome
Hello and Welcome to Our Home Page. learn more »
LOGIN
WHO's ON LINE
We have 16 guests and no members online
JobGrok
JG Listings
Carrier Oils
Nail Clippers
Our therapists
Ad Agency Remote
Essential Oils

Supplies, Description, and Usage - Tech Nails-2

Supplies, Description, and Usage - Tech Nails-2
Fiberglass Nail Wraps-
- A fibreglass mesh is used to cover the nail bed and free edge of the nail. A special bonding resin that resembles thick glue is spread evenly over the fibreglass mesh, which is then sprayed with an activator that sets the resin and makes the glass mesh bond to the nail. The wrap is filled, then buffed.
- Proper use of the fibreglass products is very important. A chemical reaction can cause a hot burning sensation to the client if used improperly.
- Also any nail bed that has been injured or recently broken , filled too thin, or is just palin sensitive can have a greater burn reaction.
- Every client must be aware of these possibilities. The heat sensation will subside almost as fast as it comes. Also tapping on top of the nail bed with an orange stick will increase circulation and distract discomfort. Test patches are recommended for anyone who is sensitive.
Files-
- There are many kinds of files , from very coarse to very fine. The coarse file is best used on acrylic and for shaping nail tips., while the finer file is used to smooth the surfac of silk or linene. Never use a worn out file, this can cause discomfort from friction.
Filler Powder-
- Fine powder in squeezable bottles is sprinkled onto the glue to fill in space between the nail tip on the underside of the nail if needed, or to fill in the ridge between the nail and tip. Acrylic powder can be used in its place but both powders are hard to file.
Fingernail Brush-
- Small brush with a handle to scrub under the free edge and clean cuticles when manicuring or doing nail artistry.
Glue Setter-
- Glue setters enable the glue to set instantly when wrapping or applying tips. They can be found in pump or aerosol sprays. The fast-drying action can make the nail bed burn if too much is used . Use caution- always spray very lightly.
- (To apply nail tips with setter, prepare nail plate, spray lightly.( To apply nail tips with setter, prepare nail plate, spray lightly, apply glue to nail tip. and press in place.It adheres instantly so be sure it is straight. Spray lightly after applying glue, then file.)
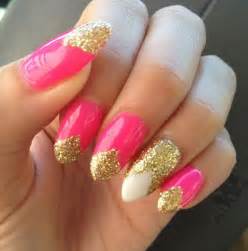
Gold Leaf-
- Gold leaf is available for applying to nails. You can get a beautiful gold nugget effect or a solid gold nail. It is applied with clear polish.
Light. Nail Gel-
- This gel is applied to a nail tip to wrap a material nail or extend the nail using the sculptured nail method. This gel does not set until exposed to the light rays of a special ultraviolet lamp.
- Light nail gel is odorless; it should be used under specific instructions according to the system purchased.
- Heat sensation can occur on the nail bed if used too thickly or if the nail is damaged.
Linen-
- Linen fabric is applied with nail glue on natural nails for reinforcement. It is also used to wrap nail extensions. Linen is stronger than silk but does not look as natural. The linen is not transparent and cannot be worn without polish.
- When applied properly it should have a smooth finish. There are several types of linen being used . The linen fabric is actually cotton. The closer the weave the better. Pre-cut and strips or rolls are available.
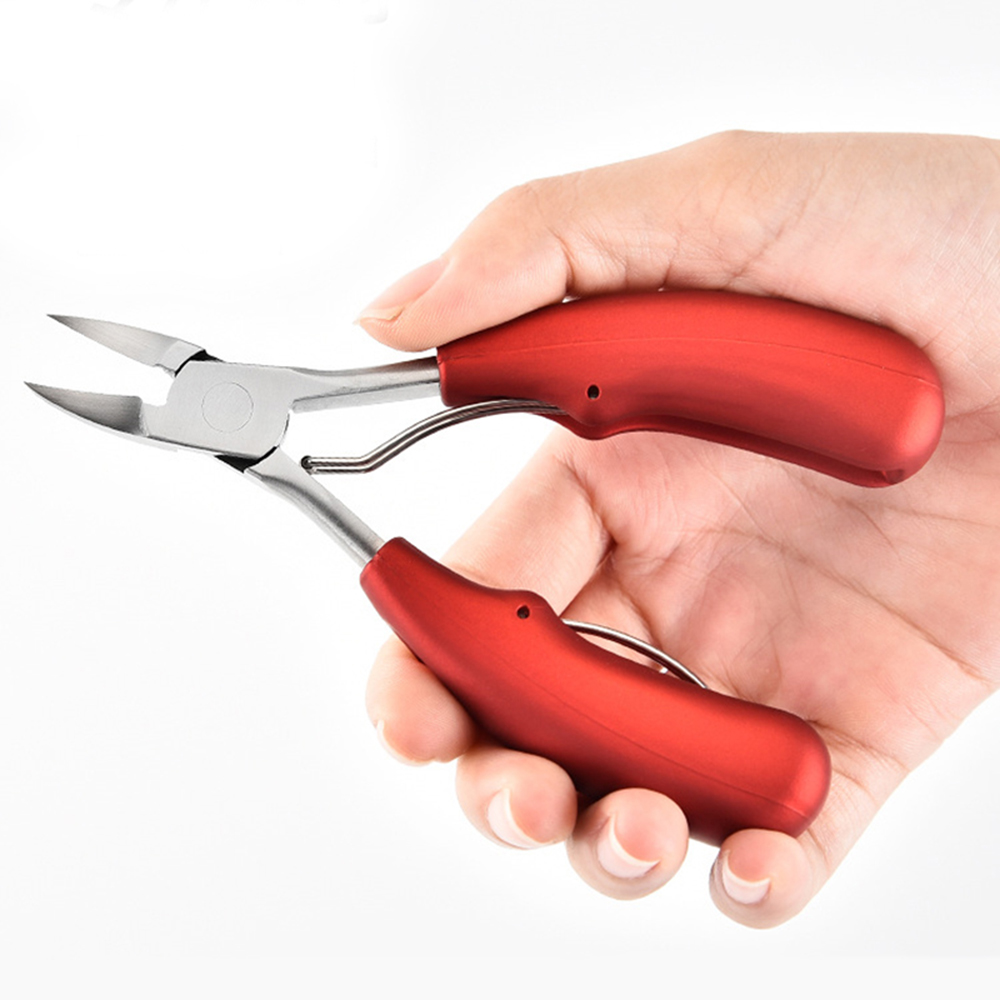
Nail Clippers-
- Nail clippers come in two sizes, small and large. The small size is to cut fingernails and the large size is for the toe nails. The toenail clippers are great for cutting nail tips when doing nail extensions.
Nail Gems-
- Nail gems come in many sizes, colors, and shapes. They are flat on one side and are easily set in clear polish to decorate nails.
Nail Glue-
- Nail glues are used for glueing on nail tips and applying linen or silk wraps. There are two types of glue: thin, fast-drying glue and thick, slow-drying. Glue will dissolve in regular polish remover or acetone.
Nail Polish Color-
- The color of the polish used should enhance the appearance of the client's nails and skin tone. Most clients will choose their own color. Usually two coats are used . When completly dry, it can darken the color. Because nail polishes vary in price choose those that wer well on the natural nail.
- Keep in mind that nails that are wrapoped will hold the polish much longer because the polish is on a solid surface. When nail polish chips, it is usually because the nail itself has chipped or peeled, thus taking the polish with it.
-
- Nail Tape-
- An adhesive tape in many colors and widths - the favourite color is gold in the thin strip.
Nail Tips-
- Nail tips are used to extend the free edge of the natural nail. Nail tips have numbers printed inside to indicate the sizes. The sizes range from one through ten, one being the largest and ten the smallest.
- Several types of nail shapes are available as well as types of plastics. Some nails are clear, yellow, hard, soft, thick, and thin. To best determine which to use try all that you can to see which is most comfortable for you.
- The shape of the client's nail bed is an important determining factor in which type of nail to use. For this reason it is wise to have several types on hand to be sure you have a compatable shape for all clients.
-
No Light Gel-
- The gel used to coat the nail is thick and easy to control with an orangewood stick. After covering the prepared nail or nail extension an activator spray is used to set the gel and bond it to the nail.
- There are several systems on the market and more to come.
- Follow the procedures given for each system. Proper use can prevent any hot burning sensations to clients. Broken nails and sensitive nail beds can burn more.
- Clients should be told to expect it. The hot spot goes away almost as fast as it comes. If you tap on the top of the nail bed with an orangewood stick after spraying, circulation will increase and distract the heat sensation.
- Always use great care when using any nail product that contains chemicals.
Reference: Tech Nails: Tammy Bigan
Supplies, Description, and Usage - Tech Nails
Supplies, Description, and Usage - Tech Nails
- The following list itemizes and describes the supplies necessary to adequately provide advanced nail techniques.
- Supplies for Manicures and Advanced Nail techniques
Acetone-
- This is used as the base ingredient for most nail polish removers.
- It is also used for dissolving nail glue, tips, acrylic and other bonding materials.
Acrylic-
-
Most acrylic nail products available on the market consist of polymers (powders) and monymers (liquids). When mixed together they harden in about one to three minutes. - The Liquid (monymer) has a strong odor which can effect the technician.
- The vapors may cause burning, itching, and watering of the eyes; dizzyiness; headaches;nausea;burning of the nose, throat, and lungs; and swelling of the nail beds and fingertips.
- Sometimes blisters will appear on the fingers or nail bed.
- To lessen these problems a disposable face mask can be worn to avoid inhalation of the vapors and dust (caused from filling).
- Also an air filter should be installed for ventilation.
- To protect hands, plastic gloves or fingergaurds can be worn.
Some customers may have an allergic reaction to the chemicals.- Ask customers if they are sensitive to chemicals mor have allergic reactions.
Signs of allergic irritations to the cuticle area, burning of the nail bed, or swelling of the finger.
If these symptoms appear, the acrylic should be removed immediately.
The powder (polymer) is available in three colours. Clear, pink, or white.
The clear and pink can be used on the nail bed and over the nail tips
The white is used to build the tip for sculptured nails.
- Alcohol-
- Used to sanitize all implements. Applied to the nail bed before the application of wrap, to clean the nail bed.
- Antiseptic Soap-
Used to clean hands and feet, antiseptic soap helps to stop the spread of bacteria, infection, and germs.- Base Coat-
- A clear base coat is used under colored nail enamel. A good base coat can prevent stains on the nail bed from dark colors and helps the polish wear longer.
- A conditioning base coat can protect the nail from enamel drying out.
- Buffers-
- Buffers are used after shaping nails to smooth the surface,.
- There are many types and shape available: square, round, oblong,and rectangular.
- You always should try new kinds to find the one that gives you the best results.
-
Cotton Balls-
Cotton balls are used saturated with polish remover or antiseptic.
- Cuticle Massage Cream-
Conditioning cream to massage into the cuticles after a manicure or any time to treat dry cuticles.- Cuticle Pusher-
- The cuticle pusher is used to push back the cuticle and carefully scrape the ccuticle that is stuck to the nailbed. Scraping too hard can scratch the nail, causing a weak spot in the nail bed.
- Metal pushers are not recommended . Plastic or wood is less damaging.to the natural nail.
-
- Duster Brush-
- A contour brush or any stiff makeup brush can be used to remove dust from the nail bed after filing and before any product is applied.
- This is better than cotton because it leaves no cotton string on the nail bed.
- Use this tool after nails have been cleaned and sanitized. Wash with antiseptic soap daily.
- Emery Block-
- Made of a sponge-like substance the emery board comes in several grades: Soft medium, medium coarse, and medium fine. Gray in color, it can be used with oil and washed.
- Feathers-
- Beautiful feathers are used like decals to decorate the nails.
- When combined with gems and stripes you can create beautiful designs
Reference: Tech nails: Tammy Bigan
Shoes, insoles and splints: Cushioning and support - Plantar fasciitis
Shoes, insoles and splints: Cushioning and support - Plantar fasciitis
When our feet hurt many of us intuitively seek out softer shoes or insoles.
- While this approach can work well for pain caused by excessive pressure, cushioning can actually make plantar fasciitis worse.
- The reason for this is that excessive cushioning encourages the arch of the foot to collapse, increasing stress on the planter fascia and exacerbating inflammation.
- So while cushioning may offer some comfort, it can work against relieving pain and inflammation. Overtly soft shoes are as plroblematic as excessively rigid shoes.
- The best footwear solutions offer a combination of cushioning and support. e.g., firm plastic or foams under the arch and denser materials in the midsole of the shoe.
- This combination is crucial to facilitate healing and prevent reccurrences of plantar fasciitis.
- Investing in at least one pair of good shoes that can accommodate an insole is important for long-term pain relief.
- Many people own shoes that aggravate heel pain. For example, dress shoes, high heels, and sandals often lack support and do not have room for insoles.
If you have shoes that are aggravating your condition, you should either stop wearing them or at least limit their wearing time and frequency until the heel pain is resolved.
- If wearing a particular pair of shoes reaggravates the plantar fascia, it is best to stop wearing them entirely.
- Insoles can be of great benefit for those who are already wearing supportive shoes but not experiencing relief. A cushioned heel cup or firm arch support can provide tremendous relief.
- Not all insoles, however are equal. Thin, light, soft, and low -profile insoles usually offer less protection then thick, dense insoles.
- As with shoes, the best results are usually obtained with insoles that combine firm support with some cushioning.
- But even the best insoles cannoct mafically turn an unsupportive shoe into a supportive shoe.
- If using over-the-counter insoles with good shoes has not helped, its time to visit a podiatrist.)
- Splints are another type of treatment for plantar fasciitis. They are used when sleeping or sitting.
- They work by keeping the foot positioned perpendicular to the leg, gently stretching the fascia and promoting its healing.
- Some, such as the Strassburg sock, look like a knee-high stocking with a cord stretching from the knee to the toes.
- Other splints are made from lightweigth padded plastic and look like walking casts.
- Splints often reduce the pain that comes with standing or walking after sleeping or sitting,
- Once you have recovered from plantar fasc iitis, you no longer have to wear a splint.
- Reference: Feet For Life: Paul Langer, DPM
Exercises for Plantar Fasciitis
Exercises for Plantar Fasciitis
- There are some gentle stretching exercises that may help you recover from plantar fasciitis and prevent future flare-ups.
- Stretching the Achilles tendon can help decrease stress and strain on the plantar fascia when walking.
Two stretching exercises work well: heel lifts and calf stretches.
- Hell lifts can help warm and stretch the fascia before standing.
- They are especially helpful for decreasing the pain when arising from bed in the morning.
- To stretch the fascia with heel lifts, place the feet flat on the floor from a sittng position.
Then raise heel while keeping the forefoot on the floor, thirty to fifty times for each foot.
- It is important to do this exercise before rising from bed in the morning or before rising from a sitting position.
To do calf stretches, lean into a wall or counter with your hands while facing forward.
Extend a leg backwards with your knee as straight as possible for thirty seconds and then with your knee slightly bent for thirty seconds.
- Concentrate on gently stretching your calf muscles.
One repetition is adequate, and stretching two or three times a day is ideal.
Your calf muscles will be easier and more comfortable to stretch if your plantar fascia and other muscles have first been warmed up (with heel lifts or normal walking.).
- To strengthen the muscles around the plantar fascia, place your feet flat on the floor from a seated position
- .
- Raise your arches while at the same time curling your toes against the floor.
You can do this exercise even whiole wearing shoes- .
For more information on stretching and strengthening exercises for the ankles and feet, see chapter 10.
Reference: Feet For Life: Paul Langer, DPM
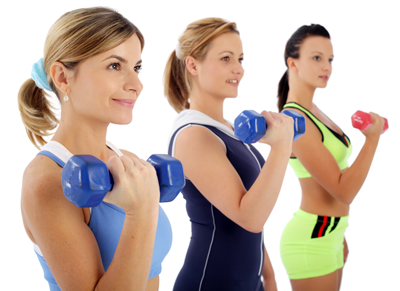
10 best bum workouts and 25 bum exercises for a 🍑'ier butt
10 best bum workouts and 25 bum exercises for a 🍑'ier butt
Are bum exercises and bum workouts for a big bum front and centre of your fitness routine? Thought as much.
- Research from the MIT Sloan School of Management found that fitness routines are heavily influenced by the people we surround ourselves with – physically and digitally, so considering the fact that several IG influencers and trainers constantly post updates on their pursuit of a more peachy rear-end, you're likely going to want to do the same.
- We'll be the first ones to tell you that there's no use in comparing your fitness journey to theirs, particularly if you're only taking the aesthetics of a big butt into account. But appearance aside and fitness front of mind, it's *so* important to include bum workouts and bum exercises in your weekly roster. Read on to find out why, plus how to wake them up and build stronger glute muscles with the best and most effective bum workouts and bum exercises.
Why are strong glutes important?
- Working on your buns is important for several reasons. They help with the following:
- Power
- Good posture
- Stability
- Strength
- Mitigating effects of tight hip flexors
- Mitigating effects of "butt amnesia" (when your glutes don't switch on, causing your lower back, hips, knees, and even your ankles to take the extra load)
Can you really make your bum bigger with bum exercises?
- Sure thing. 'It's possible to "grow" this area of your body by using your workout to activate and engage particular muscles, which will make your bum stronger, firmer and have a more shapely appearance,' says Stephen Pasterino, trainer and founder of P.volve.
- So, what type of exercise gets a rounded rear? 'Strength training and weightlifting, in particular, will help you get a big bum,' notes Loui Fazakerley, trainer at Third Space. There are three main muscles you should be targeting:
- Gluteus Maximus
- Gluteus Medius
- Gluteus Minimus
- 'The gluteus maximus is the biggest muscle in the bum area, and the one responsible for making your bum "pop",' explains Jenny Francis, trainer at F45 Islington.
'The gluteus medius is smaller and situated higher up and towards the sides of your bum, and is attached to the ligaments in your hip joint. Finally, there's the gluteus minimus, situated underneath the gluteus maximus, which works alongside the gluteus medius to help stabilise the hip.'
- If you want a big bum that's as strong as it is sculpted you need to be working all three muscles, which is where we can help.
How to get a bigger bum: 4 tips for bum exercises and bum workouts
- Follow these simple steps to feel the burn and see results:
- Don't skip glute activation exercises: They'll help engage your glute muscles and help you get the most from your butt workouts.
- Squat deep: Deep squats – where your hips dip below your knees – can almost double the effort required from your glutes as you return to a standing position.
- Single leg exercises: Compared with double-leg exercises (like squats), single-limb (a.k.a. unilateral exercise) versions (like a single leg deadlift) can fire up your bum by an extra 33%.
- Upper body positioning: 'Tilt your torso forward to 45-degree in a lunge for a hotter booty burn,' Contreras says. The angle makes your bum work harder.
- Single leg exercises: Compared with double-leg exercises (like squats), single-limb (a.k.a. unilateral exercise) versions (like a single leg deadlift) can fire up your bum by an extra 33%.
- Don't work your muscles to fatigue everyday: Muscle requires time to recover and it's during this recovery process that new tissue grows – e.g. when you grow a bigger bum.
25 best bum exercises for a big butt
Bum exercises to do at home
- Our first set of bum exercises require just your exercise mat and some motivation, so you can easily start your quest for a big bum at home, or at the gym if you fancy a change of scenery. If you're building up confidence, here is a good place to start. Favour perfect form and no weight over compromised form and heavy weight, always.
Our first set of bum exercises require just your exercise mat and some motivation, so you can easily start your quest for a big bum at home, or at the gym if you fancy a change of scenery. If you're building up confidence, here is a good place to start. Favour perfect form and no weight over compromised form and heavy weight, always.
- 1. Air squat
- a) Standing with feet hip-width apart hinge at the knees to come into a squat position – making sure your knees track in line with your toes and you can see your toes at all times.
- b) With the weight in your heels push back up to standing, squeezing your glutes at the top.
- 2. Klams
- a) Start by laying down on the ground on your side. Pop your head onto the arm that's on the ground. Start by moving your hips up to a 45-degree angle and your knees to a 90-degree angle.
- b) Push your knee away from your core but keep your feet pressed together.
- c) Pause when you get to the top of the move, clenching your glutes and ab muscles, and return to the ground. Repeat.
- 3.Glute bridge
- a) Lie on your back on a mat, with your knees bent, and feet flat on the floor. Your feet should be hip-width apart.
- b) On an exhale, squeeze your glutes and push your heels into the floor to lift your hips up towards the ceiling. Pause for a moment at the top before slowly lowering back down (first shoulders, then lower back, then bum) to the mat. That’s one rep.
- 4. Single-leg glute bridge
- a) Rest your upper back on the floor and place your feet hip-width apart, knees bent at 90-degree, so your body forms a straight line from your shoulders to your knees.
- b) Squeeze your glutes and lower your hips – that’s your starting position.
- c) Then drive through your heel to return to the top, pausing for 3 secs before slowly lowering down. Repeat.
- 5. Glute rainbows
- a) Come onto all fours on your mat. Raise your left leg and extend it straight behind you.
- b) Moving in an arc-motion and keeping your leg level with your body sweep it behind and across your right leg. Then, sweep it back past your starting position to a lateral position with your left hip. Return to centre and repeat on the other leg.
- 6. Gorilla squat
- a) With feet slightly hip-width apart and arms hanging in front of you, lower down into a squat position. Keep your knees tracking over your toes.
- b) From here let your knuckles lightly brush the ground before pushing through your heels to come back to standing.
- 7. Kneeling hinge
- a) Come into a tall kneeling position on the ground e.g. don't rest your bum on your heels. Stack your hips over your knees for stability.
- b) Engaging your core, hinge at the hips until your upper body forms a 90-degree angle and you feel your glutes engage.
- c) Using your glutes, push back to a tall kneeling position and repeat.
- 8. Hip abduction
- a) Lying on your side, use your top arm to support your upper body by placing it in front of your chest.
- b) Keep your upper body and core as still and engaged as possible and raise your top leg towards the ceiling.
- c) Lower back down – with control – and repeat.
- 9. Side lunge
- a) Standing at the top of your mat with your feet together, engage your core and lunge laterally, pushing your bum out behind you and keeping your upper back flat.
- b) Push through the heel of your lunging foot and repeat.
- 10. Curtsy lunge
- a) Standing with your feet hip-width apart lunge backwards, crossing your lunging leg over to the opposite side. You'll arrive in a deep curtsy position.
- b) Drive through the heel of your front foot to return to your starting position. Repeat.
-
- 11. In-and-Out squats
- a) Standing with your feet together, jump out into a deep lunge making sure to keep your upper body upright and your knees tracking over your toes.
- b) Jump back to standing and then immediately jump back into a deep squat. Repeat.
- 12. Squat jumps
- a) Lower down into a squat position with your feet hip-width apart.
- b) Powerfully explode upwards by pushing through your heels and using your glutes to jump. Try to extend your legs fully at the top of the jump.
- c) Land in a squat position and repeat.
- 13. Sumo squats
- a) Place your feet wider than hip-width apart and lower down into a squat position with your knees tracking over your toes. You can bring your arms overhead as you lower down if it helps keep your upper body upright.
- b) Raise back up to standing and repeat.
- 14. 90º squat jumps
- a) From standing with feet hip-width apart and toes slightly pointed out, lower into a 90-degree squat –this means your bum does not drop below your knees.
- b) Powerfully explode into a jump, trying to extend your legs fully at the top of the movement.
- c) Land in a 90-degree squat and repeat.
- 15. Bodyweight single leg deadlift
- a) Stand with one foot on the mat – with a slightly bent knee – and one foot slightly raised.
- b) Hinge at the hips to push your bum and raised leg backwards until your upper body forms a flat line.
- c) Use your glutes to return to standing, trying to keep your raised leg floating off of the ground. Repeat.
- Bum exercises with weights
- Behold, the best bum exercises using weights (dumbbells, kettlebells or a barbell).
- 16. Dumbbell Romanian deadlift
- a) Stand with both feet flat on the floor and a dumbbell in each hand.
- b) Keeping your legs straight, bend at the hips to lower your weighted hands towards the floor. Go to just below knee height and then stand straight again. Clench your glute and core muscles as you do so. Repeat.
- 17. Weighted single leg deadlift
- a) Start with your feet together and shift your weight to your left leg, knee slightly bent. Hold the dumbbell or kettlebell in your right hand. You can keep your left hand on your hip or hold it out to the side – whatever makes it easier for you to balance.
- b) Hinge at your hips to lower your chest down, while raising your right leg straight out behind you. As you hinge, lower the weight down towards the floor. Reverse back to the starting position, and repeat on this side before switching over. Remember: the weight goes in the opposite hand to the planted leg.
- 18. Bulgarian split squat
- a) Stand with a dumbbell in each hand facing away from a bench with your right leg extended back and foot on top of the bench.
- b) Bend the front knee until the knee of the rear leg is almost in contact with the floor then return to the original standing position. Try not to let your front knee (the one bending) go beyond the toes of your forward foot.
- 19. Dumbbell alternating reverse lunge
- a) Stand with your legs hip-width apart, holding a dumbbell in either hand, by your side. Step one foot back about two feet and lower your knee to the ground (making sure it doesn’t go beyond your knee), while keeping your chest and gaze upwards.
- b) Step your foot back forwards to meet the other, then repeat the exercise on the second leg.
-
- 20. Split stance glute bridge
- a) Lie on your back on a mat, with your knees bent, and feet flat on the floor. Your feet should be hip-width apart. Place a dumbbell or kettlebell over your hips.
- b) Bring one foot slightly closer towards your bum and extend the other leg until there's a gentle bend at the knee.
- b) On an exhale, squeeze your glutes and push your closer heel into the floor to lift your hips up towards the ceiling. Pause for a moment at the top before slowly lowering back down (first shoulders, then lower back, then bum) to the mat. That’s one rep. Make sure to repeat on the other side.
- 21. Dumbbell split squat
- a) Holding a dumbbell in a goblet position, place one foot in front of the other. Make sure the back foot only has the toe touching the floor.
- b) Keeping your knee positioned directly over your ankle and making sure it doesn't bend over your toe, lunge forward and clench your glutes. Lower your back knee to the floor until it touches and then push up through the soles of your feet. Keep your back straight and gaze forward.
- 22. Dumbbell curtsy lunge
- a) Stand with your feet hip-width apart, holding a dumbbell in each hand.
- b) Lunge backwards, crossing your lunging leg over to the opposite side. You'll arrive in a deep curtsy position.
- c) Drive through the heel of your front foot to return to your starting position. Make sure to repeat on the other side.
- 23. Kettlebell swing
- a) Stand with your feet shoulder-width apart and squat down to pick up the kettlebell with both hands in an overhand grip
- .
- b) Look ahead, not down, and keep your spine aligned and your knees slightly bent throughout the movement.
- c) Drive your pelvis forward to swing the kettlebell out and up to shoulder height.
- d) Allow the weight to drop back down, hingeing at the hips as it swings between your legs.
barbell-deadlift-1 alice© rebecca jacobs24. Barbell deadlift
-
a) Stand holding the bar with a very wide stance, knees bent and your shoulder blades pulled in towards each other.

- b) Lift the bar using your legs while keeping the upright torso position. Carefully lower. Turn your toes out if you need to – it helps movement and doesn’t count as cheating.

-
25. Barbell hip thrust
-
a) Sit on the floor with your shoulder blades against a bench or step. If adding a dumbbell or a barbell, balance it on your hips.
- b) Keeping your chin tucked in, push up through your hips to lift your bum off the floor.
- c) Clench your bum at the top – your shoulders, hips and knees should be in a straight line. Lower back down in a slow, controlled movement
- Want complete workouts? We've got you. Scroll on!
10 bum workouts to get a big bum
No need to trawl the internet for their 'booty workouts' (with super spicy bum exercises thrown in), we've done the hard graft and rounded up the bum workouts worth your time. Just remember to save time for a cool down at the end - it'll save you from the worst of bum-focused delayed onset muscle soreness.
If you're also wondering how often to do a bum workout, know that there's no hard and fast rule – it comes down to what your goals are and what your lifestyle and personal commitments entail. Making it a regular occurrence (once to three times a week) as part of a larger lower body workout is more than suitable. It mostly comes down to what you have time for. Now, without any further ado, the 10 best bum workouts to try now.
Fitness star and qualified trainer Krissy Cela reveals the seven moves in the gym weights section that really transformed her glutes. Spoiler: they are hip thrusts, sumo deadlifts, stiff-legged deadlifts, split squats, glute bridges, walking lunges and abductions.
- Story by Morgan Fargo, Bridie Wilkins: Womens Health
Articles - Latest
- Supplies, Description, and Usage - Tech Nails-2
- Supplies, Description, and Usage - Tech Nails
- Exercises for Plantar Fasciitis
- Shoes, insoles and splints: Cushioning and support - Plantar fasciitis
- 10 best bum workouts and 25 bum exercises for a 🍑'ier butt
- The dos and don’ts of running when you’re over 40
- This 30-minute workout can be done from just about anywhere
- I teach stretching routines for a living — 3 exercises that strengthen your hips and open your hamstrings
- Somatic exercise has gone viral promising to lower cortisol levels, ease stress, and boost health - so, does it actually work?
- Planks and wall sits best exercise for lowering blood pressure, study says
- Four moves and six minutes is all you need to develop strength with this no-equipment routine
- I did a two-minute Farmer’s Carry every day for a week — here’s what happened
- No squats or lunges: This knee-friendly workout sculpts your lower body in 7 exercises
- Two dumbbells and five moves are all you need to build strength in the shoulders and back
- Add Muscle, Build Stamina and Fire up Your Metabolism with Our Three-Move Strongman Circuit
- How to clean running trainers without ruining them: 3 easy steps to take
- Podiatrist shares pain-inducing mistakes we're making when wearing high heels
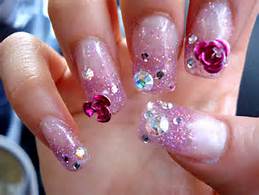
- 9 things you need to know before getting acrylic nails
- Running could be just as effective at treating depression as medication, scientists find
- This is How Long You Should Rest Between Sets, Whatever Your Training Goal
- Manicurists Share Their Top Tips For Growing Stronger Nails Without Giving Up On Those Gel Manis
- Dry, cracked heels: Here are the most moisturizing ingredients according to a dermatologist
- Treatment for Plantar Fasciitis
- How to measure your feet: A guide for runners
- Heel and ankle conditions and Injuries
Articles-Popular
- Home
- Calluses and Corns-4-Padding and Insoles To relieve Pressure
- Contacts
- Appreciate Your Feet
- WEB - LINKS
- Therapy Price List- Aromatherapy - Counselling
- The Awareness of Foot Care
- Nail Technician Resume
- Join us as a Therapist
- Gallery - Pedicured Feet
- Podiatry/Chiropody Price List
- Skin Care-Feet
- TCM - Therapy Prices
- Blisters on the Feet
- Nail Technician Job Description
- Galleries
- Bacterial Infections
- Itching Skin on the Feet
- Athlete's Foot
- Sweaty or Smelly Feet
- Appointments
- Skin Changes Associated with Blood Flow
- Common Toenail Conditions - Changes in Nail Colour
- Calluses and Corns - 2
- Insoles
