LOGIN
WHO's ON LINE
We have 350 guests and no members online
JobGrok
JG Listings
Carrier Oils

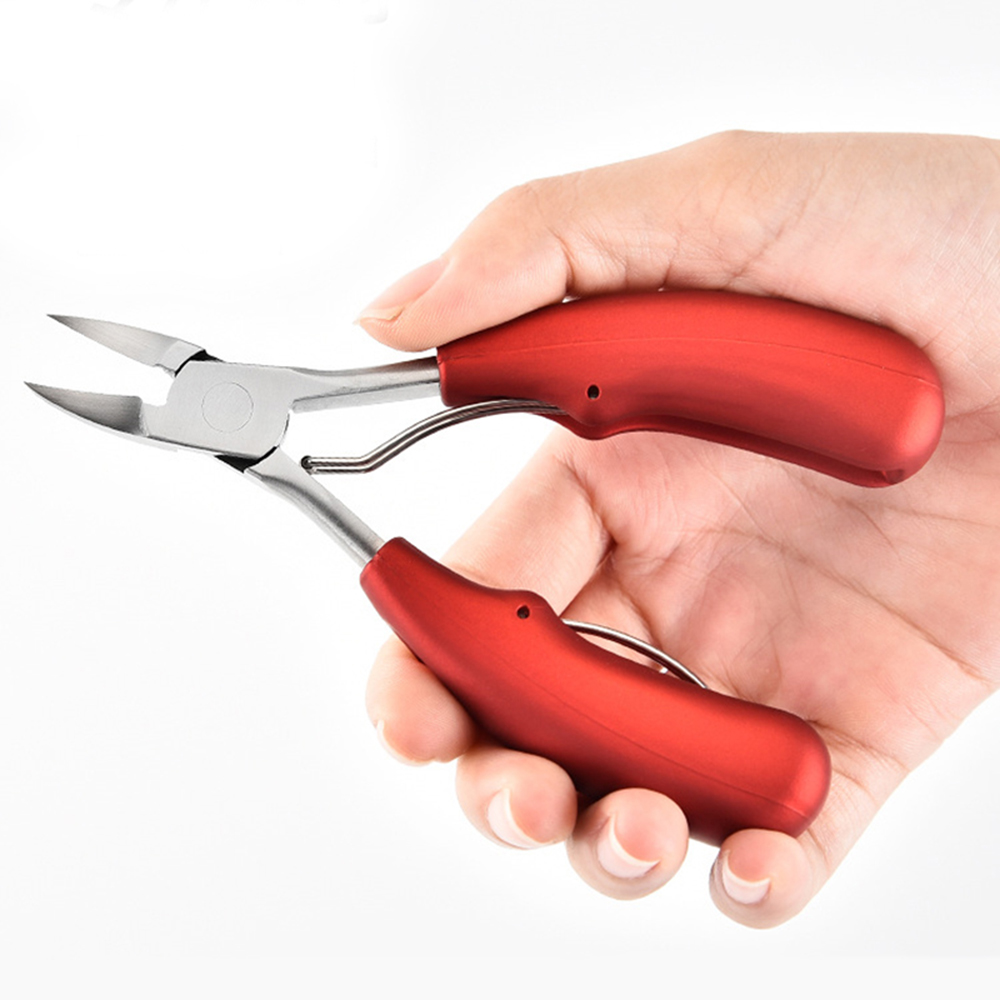
Nail Clippers
Ad Agency Remote
Essential Oils

A yoga teacher says this five-minute stretch is all you need to maintain flexibility in your spine

A yoga teacher says this five-minute stretch is all you need to maintain flexibility in your spine
Having a sedentary job, lifting heavy weights and the natural aging process can all contribute to a stiff and achy back. Regular movement and stretching can alleviate aches and pains, but it’s not always easy to know where to start.
- If your back is feeling particularly rigid right now, yoga instructor Francine Cipollone has created a routine that works your spine through its six main movement patterns.
These movement patterns include flexion, extension, rotation, and lateral flexion. Flexion is when you bend your spine forward, and extension is when you bend it backward. Rotation involves twisting your back to either side, and lateral flexion is when you bend to the side.
Cipollone says all of these movement patterns are vital for spinal flexibility. So if you’ve got five minutes, it’s worth rolling out your mat and giving this session a go.
How to do Yoga with Bird’s five-minute back stretch
- Seated side stretch
- Seated twists
- Cat/cow
- Child’s pose
Tips for maintaining a healthy spine
A systematic review published in the International Journal of Sports Physical Therapy concluded that core strengthening exercises could be a "favorable method" for treating pain in those suffering from non-specific lower back pain.
- Drinking enough fluids could also help you maintain a healthy spine. A 2022 study found a relationship between lower back pain and dehydration (although more research is needed here).
- In addition to the above, try standing up and moving regularly throughout the day. But before adopting a new exercise regime, check in with your physician.
Story by
Can't do a deep squat? Use this coach's four-step plan
Can't do a deep squat? Use this coach's four-step plan

The squat is a well-known lower-body exercise that targets multiple muscle groups. A deep squat elevates the standard exercise to the next level, demanding more mobility in your hips, quadriceps and glutes. It also builds strength and stability in your core, because you have to engage your trunk muscles to maintain your balance.
- Trainer Malin Malle, known as Calixpert on Instagram, uses calisthenic exercise principles to help her clients improve their strength, mobility and flexibility. While calisthenics may seem daunting for beginners, the good news is that there's often a step-by-step progression from an easy movement to a difficult one. Practice regularly and you'll be amazed at what your body can do. In her post, Malle, outlines such a progression.
How to progress to a deep squat
Benefits of a deep squat
There are many benefits to performing deep squats. "Probably the most obvious would be improved quadriceps [front of thigh], hamstrings [back of thigh] and gluteal [buttock] muscle mobility," says Stuart Galise, a physiotherapist and clinical director of Physioimpulse.
Galise says these muscles are vital for everyday movements, such as sitting down and standing up from the floor.
What is calisthenics?
Earlier this year, we spoke to trainer Gus Vaz Tostes who outlined the differences between CrossFit and calisthenics. "[Calisthenics] is very similar to Olympic gymnastics, through its inclusion of pulling, pushing and handstand sequences," says Vaz Tostes. "It originated in parks; however, it has now moved to gyms and group classes. It is a very accessible training methodology as you only use your bodyweight. But, if possible, you'd need access to a pull-up bar and some parallettes."
- Story by
Surprising Benefits of Using Bay Leaves on Your Feet
Surprising Benefits of Using Bay Leaves on Your Feet
The Surprising Benefits of Bay Leaves for Foot Care
Did you know that nearly 75% of Americans experience foot problems at some point in their lives? As the trend toward natural remedies continues to grow, one powerful yet often overlooked solution lies in your spice cabinet. Bay leaves, those unassuming herbs you might add to soups and stews, hold remarkable healing properties for tired, aching, and problematic feet. This ancient herb offers a natural alternative to chemical-laden foot products, combining centuries of traditional wisdom with modern scientific backing.
What Are Bay Leaves and Their Traditional Uses
Laurus nobilis, commonly known as bay laurel or sweet bay, has been revered across cultures for millennia. These aromatic leaves were used by Ancient Greeks and Romans not just for culinary purposes, but as medicine and symbols of honor. Wreaths of bay laurel adorned the heads of scholars, athletes, and heroes.
- In Ayurvedic medicine, bay leaves have been utilized for their anti-inflammatory and antimicrobial properties. Mediterranean cultures incorporated them into poultices for joint pain and skin conditions. The Caribbean and Latin American traditions also embrace bay leaves for their healing properties in foot baths and compresses.
- What makes bay leaves so special is their rich profile of essential oils – containing up to 5% of compounds like eugenol, myrcene, and cineole – that contribute to their therapeutic effects.
- The Science Behind Bay Leaves’ Foot Care Benefits
- Modern research confirms what traditional healers have known for centuries. The active compounds in bay leaves, particularly eugenol and cineole, exhibit powerful antimicrobial and anti-inflammatory properties. A study published in the Journal of Ethnopharmacology demonstrated that bay leaf extract effectively inhibited the growth of several strains of fungi, including those responsible for athlete’s foot.
- The essential oils in bay leaves penetrate the skin, creating a hostile environment for microbes while stimulating circulation and reducing inflammation. Research has shown that bay leaf compounds can be as effective as some over-the-counter treatments for minor fungal infections, with fewer side effects.
-
- Additionally, the antioxidant properties of bay leaves help neutralize free radicals, potentially accelerating healing and reducing tissue damage in overused feet.
-
-
7 Powerful Benefits of Bay Leaves for Foot Care
1. Anti-fungal Properties for Athlete’s Foot
The potent compounds in bay leaves create an inhospitable environment for Trichophyton fungi that cause athlete’s foot. Regular application can reduce itching, burning, and peeling associated with this common condition. For best results, consistent application is key – try a bay leaf foot soak before bedtime.
- 2. Odor Elimination and Prevention
- Bay leaves contain natural deodorizing compounds that neutralize foot odor at its source rather than simply masking it. These antibacterial properties prevent the bacterial growth that leads to unpleasant smells, even in those who struggle with persistent foot odor.
3. Pain Relief for Tired Feet
The anti-inflammatory compounds in bay leaves help reduce the aches and pains of overused feet. The natural analgesic properties can provide relief after long periods of standing or walking. A warm bay leaf soak is particularly effective after a strenuous day.
- 4. Anti-inflammatory Effects for Swelling
- Bay leaves help reduce inflammation and water retention in feet, making them particularly beneficial for those who experience swelling due to poor circulation, long periods of sitting, or minor injuries. The compounds in bay leaves encourage excess fluid drainage and reduce inflammatory responses.
5. Improved Circulation
The warming properties of bay leaf essential oils stimulate blood flow to the extremities. This improved circulation can help with cold feet, minor neuropathy symptoms, and overall foot health. Enhanced blood flow also accelerates healing of minor cuts and blisters.
- 6. Skin Softening and Callus Reduction
- Regular bay leaf soaks soften hard skin and gradually reduce calluses. The natural compounds break down hardened skin cells while the moisture penetrates and hydrates rough patches, revealing softer, healthier skin with consistent use.
- 7. Detoxification Benefits
- Bay leaves can help draw out toxins through the pores of the feet. This detoxifying effect may help reduce foot odor, improve skin condition, and contribute to overall foot health. Some users report feeling refreshed and energized after regular bay leaf foot baths, which may be attributed to this detoxifying effect.
How to Prepare Bay Leaf Remedies for Foot Care
Basic Bay Leaf Foot Soak
The simplest way to harness the power of bay leaves for your feet is through a therapeutic soak:
- Bring a large pot of water to a boil
- Add 10-15 dried bay leaves (or 7-10 fresh ones)
- Reduce heat and simmer for 15-20 minutes
- Let cool until comfortably warm
- Transfer to a basin and soak feet for 20-30 minutes
- Pat dry and apply moisturizer
For enhanced benefits, consider adding 2 tablespoons of Epsom salt and a few drops of tea tree or lavender essential oil to your bay leaf foot soak.
Bay Leaf Foot Paste
For targeted treatment of fungal infections or particularly rough skin:
- Grind 5-7 dried bay leaves into a fine powder
- Mix with enough coconut oil to form a paste
- Apply directly to affected areas
- Cover with a cloth or sock and leave overnight
- Rinse in the morning and repeat daily for best results
- Precautions and Potential Side Effects
- While bay leaves are generally safe for external use, some precautions should be observed:
- Always perform a patch test before full application to check for allergic reactions
- Those with known allergies to plants in the Lauraceae family should avoid bay leaf treatments
- Pregnant women should consult with a healthcare provider before use
- Discontinue use if irritation, redness, or discomfort occurs
- For persistent or severe foot conditions, consult a podiatrist or healthcare professional
Embracing Natural Foot Care
Bay leaves offer an impressive array of benefits for foot health, from fighting fungus and odor to reducing pain and improving skin texture. This ancient herbal remedy bridges traditional wisdom and modern science, providing a natural alternative to chemical treatments for common foot concerns.
- By incorporating bay leaf foot treatments into your regular self-care routine, you can experience the transformative effects of this humble herb. Whether you’re dealing with specific foot issues or simply want to pamper your hardworking feet, bay leaves present a natural, affordable, and effective solution.
The next time you reach for bay leaves in your kitchen, consider setting aside a few for your foot care routine – your feet will thank you for this aromatic natural therapy that has stood the test of time.
- Reference: https://grandmaremedy.net/
6 Reasons Your Feet Are So Itchy
6 Reasons Your Feet Are So Itchy
So you had a whole day without a single itchy peep from your feet. And when you get into bed at night, all of a sudden your feet start itching. You scratch the spot and go back to resting. But the itch isn't done. So you repeat. Repeat. Get frustrated. Toss. Turn. Repeat.
Why is it that your feet seem to suddenly itch at night? Not like you're wearing itchy socks. Not like your sheets are any different than they were last night. So what's up
Certain theories tend to get trotted out about itchy feet at night. 'There are some common assumptions about it that probably aren’t correct,' says Brian S. Kim, M.D., vice chair of research, department of dermatology, at the Icahn School of Medicine at Mount Sinai in New York, co-director at the Centre for the Study of Itch at Washington University School of Medicine. One classic hypothesis that gets bandied about is that people are less distracted at night and all of a sudden tune into the itch. 'I don’t think it’s that simple,' says Dr. Kim. That said, it's not entirely clear what a more accurate answer is yet.

Why Your Feet Itch at Night
One newer hypothesis is that nighttime itching could be a result of end-of-day changing circadian rhythms, Dr. Kim says. At night, the anti-inflammatory chemicals in your body are lower, and they may have to do with regulating the sensitivity of itching. 'You may get a cleaner kind of signal from a nighttime itch,' he says.
Evolutionarily, that stronger, cleaner itch signal at night might have served us well. 'I’m getting really speculative here, but if you don’t move at all at night, you may be more susceptible to getting infestations with mites, or even getting bitten by mosquitoes,' says Dr. Kim.
Ask why people’s feet, in particular, itch and dermatologists take a deep breath, because there can be a huge number of drivers. Some are very simple, others not so much. Causes can include:
Athlete’s Foot
'When a patient comes in and complains of itchy feet, the first thing a dermatologist usually does is look between the toes to see if there’s redness, cracking, flaking, or scaling,' says Shawn Kwatra, M.D., assistant professor of dermatology at Johns Hopkins Medicine. Those often indicate athlete’s foot, and remedies include keeping your feet as dry as possible—that might include powder and/or moisture-wicking socks—and using an over-the-counter anti-fungal product.
- Common athlete's foot products include the ingredients terbinafine or clotrimazole. These come in many different formats—creams, powders, sprays—and you may need to experiment a bit to figure out which works best for you, according to the Mayo Clinic. And give it some time to clear up: it could take as long as four weeks, but it also might clear up a lot sooner than that. (Random fact if you're dealing with this: Be careful when you put your underwear on. If your feet are infected with athlete's foot, the fungus can catch a ride on your underwear and end up giving you jock itch.)
Dry Skin
'As you get older, you have less of an ability to retain water in the outer layer of skin,' says Dr. Kwatra. On top of that, since you’re walking on your feet all day, the skin there can be thickened and dry, anyway. All of which adds up to extra itch on your feet. Help stop it by applying moisturising cream—the kind that comes in a jar—on your feet at night. 'Cream is more moisturising than lotion,' Dr. Kwatra points out. 'The more gooey it is, the more moisturising it is.'
Skin Conditions Including Eczema and Psoriasis
These usually make other parts of your body itchy, and the feet aren’t exempt from feeling it. For psoriasis, especially, it's worth seeing a doctor. There are different types of psoriasis, and there are many different treatments. Some people may get relief through topical creams, especially if only small amounts of their bodies are affected. Others may benefit from phototherapy (ultravioletlight therapy). And there are oral and injected medications as well, so you can see why it's important to have a pro on your side.
- If you think eczema is what's bothering you—some of the symptoms include dry, cracked skin; raw, sensitive skin from scratching; small bumps on brown or Black skin; thickened skin; oozing and crusting, according to the Mayo Clinic—get it checked so you can get the right relief. Don't just buy a moisturiser and keep on scratching if it doesn't offer relief. Dermatologists have numerous tools to help eczema bother you less.
Other Medical Problems
Nerve damage caused by unchecked diabetes can cause itching in the feet, as can liver disease. Sometimes, Dr. Kwatra says, 'itch on the body can be a harbinger of underlying illness.' Most of the time, itch that hints at an underlying illness won’t just be in your feet. 'Take it in context with the rest of your health,' he says. In other words, not every itchy foot is going to be the sign of a big issue like these, but if itchy feet are a consistent and long-standing problem for you, get yourself checked out, says Dr. Kwatra.
- Systems We Haven’t Even Figured out Yet
- 'Itching may be a result of multiple system failures,' says Dr. Kim. Itch may not just be one symptom, there may be many forms of itch. 'Itch is almost a field of medicine onto itself,' he says. And only the surface has been scratched, so to speak.
- Research on why scratching the itch is satisfying—at least until the itch resurfaces and you scratch again and again—suggests that scratching creates a little bit of pain. That drowns out the itching sensation. To dull the pain feeling, your brain releases serotonin, the theory goes, making itching feel good and satisfying. At least until the itch/scratch/itch/scratch cycle seems never ending.
-
How to Stop Itchy Feet at Night
The toolbox for stopping that annoying itch—if it's not an issue you need to see a doctor for—is pretty straightforward:
- Use moisturiser. If your feet are extra dry, use heavy-duty creams there.
- Consider a product with menthol. The cooling sensation that you get with menthol can help dim the feeling that you need to itch by confusing the nerves that are transmitting the itch signal.
- Manage your stress. There’s likely an itch/stress cycle that begins when things get really bad—itch can trigger a lot of anxiety and stress, and it’s likely that that triggers more itch. Even on a more casual itch level, stress probably plays a role, too. 'Lots of patients ask me, "Did my stress cause this?"' says Dr. Kim. 'My answer is that I don’t think so, but it does aggravate it.'
I run 50 miles a week and this is my go-to 20-minute yoga-for-runners workout to boost my flexibility
I run 50 miles a week and this is my go-to 20-minute yoga-for-runners workout to boost my flexibility
There are a lot of ways to support your body when you run regularly. Picking up a pair of the best running shoes is a good place to start, then you can look at strength training for runners and using recovery tools like massage guns and foam rollers.
- My favorite form of support as a regular runner who usually logs 50 to 70 miles a week is yoga for runners. In particular, there's one video I found
- Yoga’s YouTube channel in 2018, when training for the Valencia Marathon. Since then, I’ve done this yoga-for-runners workout 2-3 times a week on average, sometimes more during demanding marathon training weeks.
-
-
I’ve probably done the video more than 250 times in total, and I find it perfect for stretching after tough sessions and long runs. I’ve been pretty lucky with injuries in this time and while no-one would call me flexible, I’m convinced doing this workout regularly has helped to look after my body.
-
During this time, I’ve tried many other yoga-for-runners sessions on YouTube, and while there are some I like, the Ekhart Yoga session is by far my favorite, partly because it doesn’t involve a lot of sitting poses, which I find very hard owing to my general lack of flexibility in the hips. It's still worth rolling out one of the best yoga mats for the session though, as there are some floor-based moves to do.
What is the yoga-for-runners workout?
The yoga-for-runners session is 20-minutes long, and it’s a flow session where you go from one move to the next, holding the key stretches for long periods. It’s best done after a tough run, though it doesn’t need to be straight after. I usually do the workout in the evenings and always feel better for it the following day.
- To benefit runners in particular, the sessions focus on stretching the lower body — in particular the calf muscles, hamstrings, glutes, quads and hips. Moves like downward-facing dog and warrior pose are held for long periods, and you also stretch out your back.
- As mentioned above most of the workout is done standing or kneeling, rather than doing seated poses, which I find very difficult. Many runners have tight hips and hamstrings like me, so this mostly-standing approach is helpful for actually being able to get into the poses and stretch the right parts of the body.
- That is the most important part of this workout, as with most yoga sessions, that you are stretching the right muscles with each move. The instructor gives lots of form tips and says where you should feel the stretch, so pay attention to her to get the most from the routine. I’ve applied the advice I get in this session to lots of other yoga I’ve done, especially how to do the warrior 2 pose correctly.

Over time, I’ve added my own moves into this routine to target parts of the body I particularly need to stretch after runs. At one point, the instructor asks you to hold a tree pose on each leg, which is beneficial, but I prefer to use this time to do the pigeon pose and the world’s greatest stretch to target my hips and glutes more.(
- I also use a variation for the quad stretch near the end of the workout — I just do a standing stretch where I pull my heel in toward my butt instead of the floor-based move. Then I skip the final stretch, which is a seated one that I find difficult, instead lying on my back and using a strap looped around my foot to stretch my hamstrings by raising my legs.
-
The workout itself is a great base to start with to aid your running recovery, but making little amends like this to suit your own needs is worthwhile over time, especially if you also end up doing the routine several times a week for years.
- Story by
Articles - Latest
- A yoga teacher says this five-minute stretch is all you need to maintain flexibility in your spine
- Can't do a deep squat? Use this coach's four-step plan
- 6 Reasons Your Feet Are So Itchy
- Surprising Benefits of Using Bay Leaves on Your Feet
- I run 50 miles a week and this is my go-to 20-minute yoga-for-runners workout to boost my flexibility
- How to do hanging leg raises with perfect form, according to trainers
- The two exercises everyone should add to their strength workouts to see results, according to an expert trainer
- 1 year of heavy strength training could offer 4 years of benefits, study suggests
- Research Has Unveiled How Many Sets You Need to Do to Build Muscle
- I did 50 frog crunches every day for a week — here's what happened to my abs
- 10 physio-approved exercises for runners that will help you build strength and mobility
- Forget sit-ups — this 3-move standing ab workout chisels your abs and obliques
- What to do when plantar fasciitis is so bad you can't walk
- Five exercises better than side bends to sculpt strong obliques
- Forget Russian Twists — this 10-minute stability ball workout targets your abs and glutes
- Professor explains how we are all doing one exercise wrong and it is causing us pain
- Supplies, Description, and Usage - Tech Nails-2
- Supplies, Description, and Usage - Tech Nails
- Exercises for Plantar Fasciitis
- Shoes, insoles and splints: Cushioning and support - Plantar fasciitis
- 10 best bum workouts and 25 bum exercises for a 🍑'ier butt
- The dos and don’ts of running when you’re over 40
- This 30-minute workout can be done from just about anywhere
- I teach stretching routines for a living — 3 exercises that strengthen your hips and open your hamstrings
- Somatic exercise has gone viral promising to lower cortisol levels, ease stress, and boost health - so, does it actually work?
Articles-Popular
- Home
- Calluses and Corns-4-Padding and Insoles To relieve Pressure
- Add Muscle, Build Stamina and Fire up Your Metabolism with Our Three-Move Strongman Circuit
- The two exercises everyone should add to their strength workouts to see results, according to an expert trainer
- Appreciate Your Feet
- Therapy Price List- Aromatherapy - Counselling
- WEB - LINKS
- The Awareness of Foot Care
- Nail Technician Resume
- Contacts
- Join us as a Therapist
- Blisters on the Feet
- Skin Care-Feet
- Itching Skin on the Feet
- Nail Technician Job Description
- TCM - Therapy Prices
- Podiatry/Chiropody Price List
- Galleries
- Bacterial Infections
- Athlete's Foot
- Sweaty or Smelly Feet
- Appointments
- Calluses and Corns - 2
- Skin Changes Associated with Blood Flow
- Gallery - Pedicured Feet
